Photogrammetry is a new technique for me, so I spend much more time than the hand-drawing record process before going to the site and planning out the process of recording. Although it is okay to use the phone camera to complete the task. But to achieve a higher-resolution result, I borrowed a camera from the University. And I planned the field trip on a day that was predicted to be a more likely cloudy day to avoid strong shadow contrast in the photos.
Then I roughly estimated how to take photos of it based on the size of the subject to try to improve the rate of success under a one-time site visit. I planned three different height-level rounds of photos of the whole subject from the exterior. And then take another two rounds of photos from the interior of the subject at two different heights. With each photo overlaying with each other more than 50%, hopefully, these rounds will be able to generate the whole building model.
While I was on-site taking photos, I realized that it is almost impossible for me to take photos of the roof without a ladder. I did bring a ladder to the site, but it is too dangerous to climb up it by myself, due to the undulating topography. I ended up taking photos from a distance zooming into the roof details.
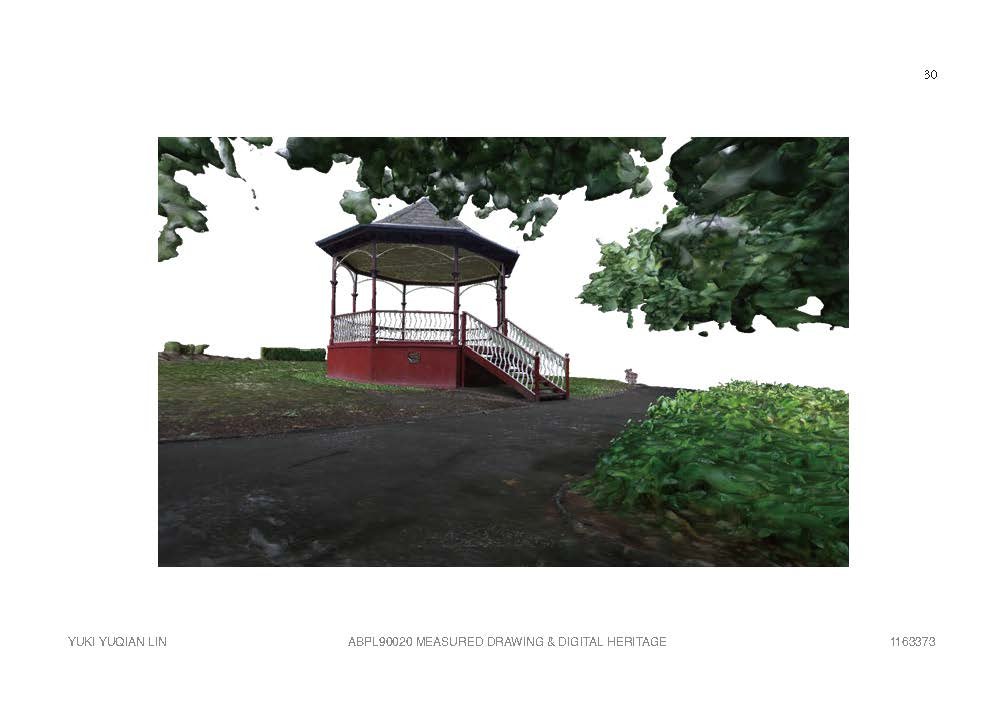
After 10 hours of computer calculation and generation in Metashape, the result of my 2,136 photos is relatively satisfactory. Some errors in detail caused by the confusion from a very similar and highly vegetated background of the site still exist on the handrail parts of the entrance stair. This assumption is based on the comparison between photogrammetry results and real photos in the 'details and texture' section. Although I took some detailed photos of the ornament of the posts, the Metashape cannot align them. This is maybe caused by the high similarity between each post, which makes the sequence of taking these photos more significant. And also, the way and order I added the new photos of these details could be improved in the future to achieve better resolution of detail in repetitive items. And more logical photos should be taken for the post detail to resolve the blurriness of the top part of the bandstand.
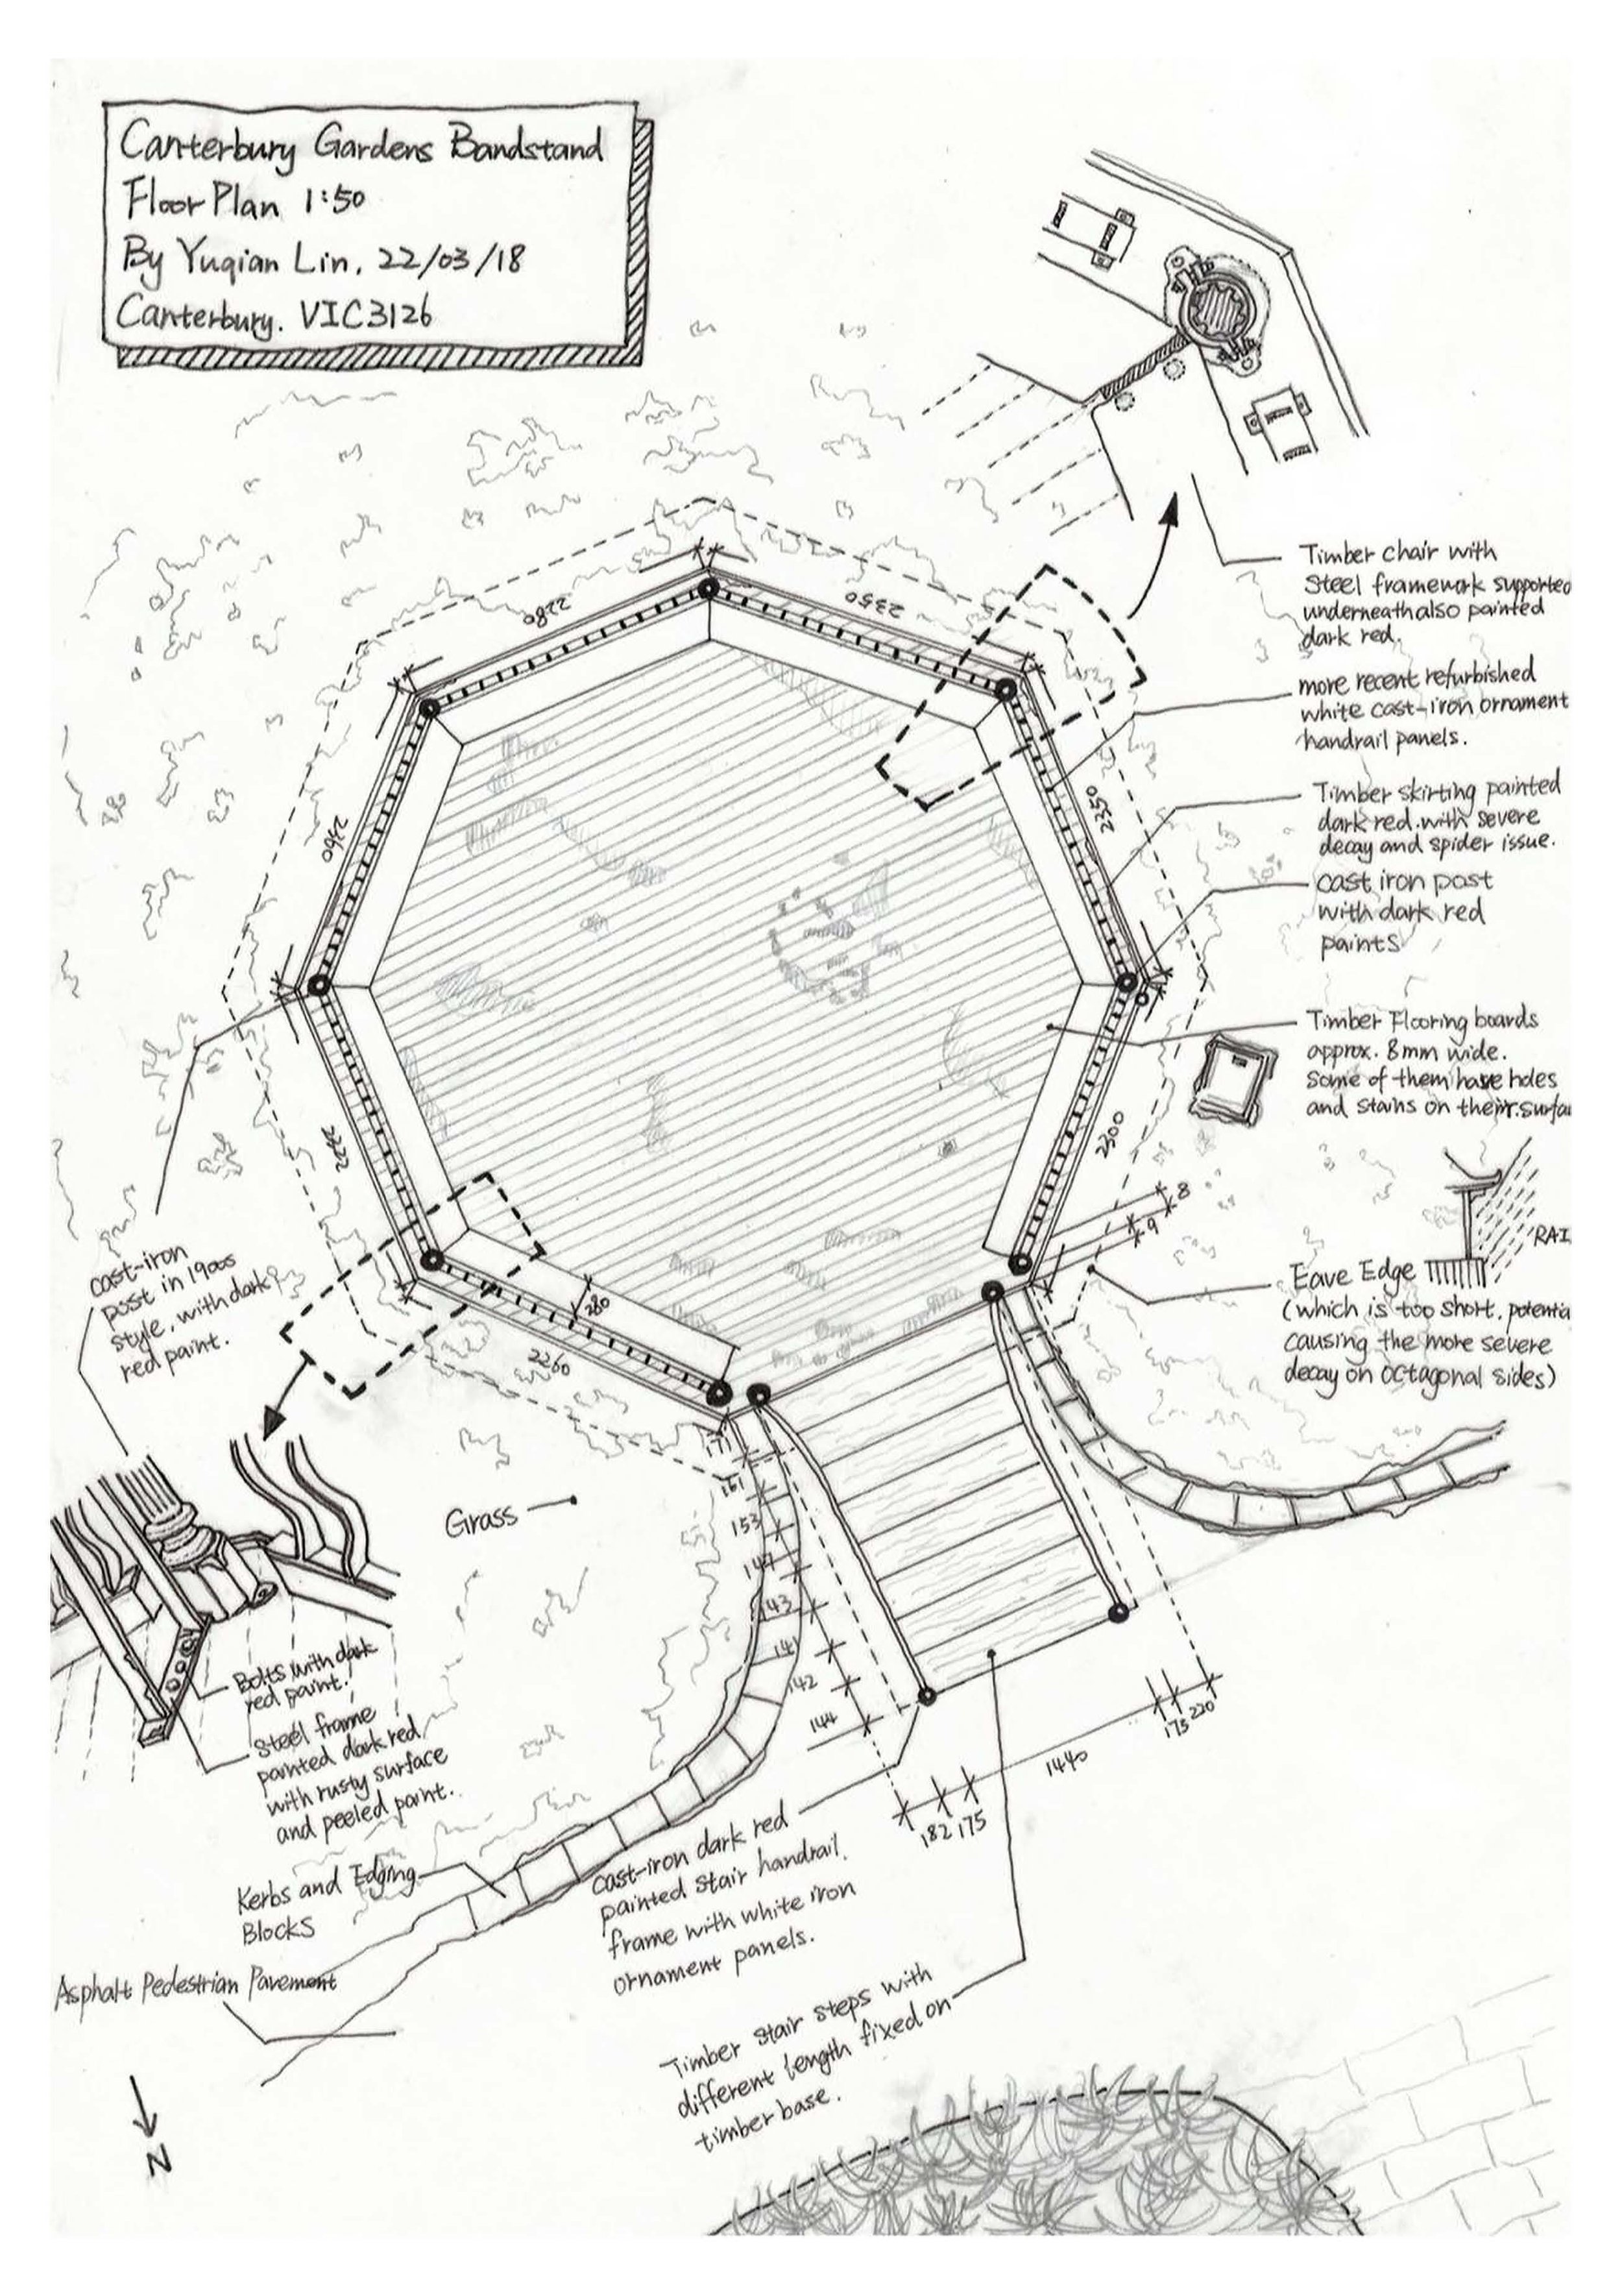
After using the photogrammetry technique in the same subject as the hand recording and measuring subject, I found the most significant difference between these two methods is the level of objective and naturalistic. Personally speaking, the time I spend on the manual recording is way less than the photogrammetry to achieve similar documentation of the subject. Similar blind spots still exist using photogrammetry techniques, like the roof and gutter structure. For this subject, the camera works like my eyes for manual recording. The camera can capture the things I can see as well. Smaller objects or partial objects might be more suitable for the photogrammetry technique. However, it is undeniable that the photogrammetry technique did capture much more detail on textures, and colours with higher accuracy and no subjective bias. It cannot automatically capture the correct scale, but this can be fixed by post-photogrammetry adjustment and also adding markers on-site or in Metashape. Overall, the requirement of equipment and pre-visiting planning is much higher than manual records to achieve a high-resolution result as texture and colour supplement for my previous manual recordings.
MSD_Measured Drawing and Digital Heritage
Coordinator & Tutor: Ursula & David
Individual